Yesterday we added our Ident to the footage we had filmed, today we edited and attempted to add a title from live type. -Jennifer
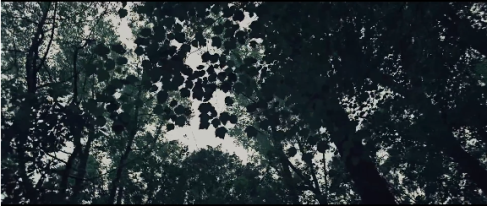
Today we continued with our production for our opening sequence, we continued to edit our opening sequence, so far we have selected the clips that are of a high standard and perfected them, we trimmed and cropped the clips.In our opening sequence, the first few shots are of trees to establish the location, today we put these clips in slow motion to give it more a cinematic effect, we added the cross dissolve transition today to the clips so the clips could flow more freely and fluently, we did this on adobe elements, today we also added our Ident to the start of the clip, the problem with the adding the Ident was that we made it using after effects and the file types were different, so we had download the clip from Youtube and then drag it in to the editing software and then trim and crop it. We made the clip ‘Dip to black’ to also add the cinematic effect.
We also worked on the titles for our film using LiveType,LiveType allows users to create and edit titles using a simple graphical interface. I find the programme difficult to use because it’s an unsual software and they’re are not many alike available on the market, it will take a short period for me to fully become aware of the full features of the software.
– Jaiye Peters
Today I worked on the opening title of our film on Live type, it was very hard to get a hang of at first as it was fairly complicated, however, with much experimenting I was able to understand the way the software works. I was then able to create a sample title and export it from an Apple Mac into Premier elements on a PC. This was a very Long process.
~Justine
Yesterday we had started filming for our opening sequence, we decided to use the school’s woodland area for our opening sequence, as it was foggy and gloomy and this was what we needed to create a tense and dynamic atmosphere. We started by filming panoramic shots but when we had finished doing this and it came to editing, we found out that the shots we had recorded were not to a high standard, the shots were shaky, so we decided to re-film the shots in order to deliver the best quality to the audience, This time we used a Tri-pod to assist us filming.
– Jaiye Peters
When we decided to start filming our opening sequence, we had our storyboard finished, I looked at our storyboard and noticed that our setting and location was similiar to one I came across in a music video, so we used it as inspiration and as a little guidance, we tried to imitate the camera movements in the music video. The camera pans from left to right and the video was colour corrected. 
– Jaiye Peters
After we had had got parts of are footage we started editing it, we done this as it is easier to identify what we are missing giving us time to reshoot and we are hoping that of we edit as we go along hopefully we won’t miss any faults and will not have to rush all the editing once we have complete all the shooting.
-Jaiye
Today me and the rest of my team went I to the woods to reshoot parts of the opening sequence, this was very hard as there was thick mud so we were very limited, however, we accomplished what was required of us and we were very pleased with the shots we had collected.
~Justine
Today me and Justine went to the woods near our school. We took photos of the area and various different camera shot angles of the woods to put in our clip. -Jennifer